Today, I’m talking about something that’s completely on a tangent compared to what you usually see on the blog. I got inspired to write this post as I recently gave my bedroom a massive makeover (by my standards at least!) and as someone who usually botches, even the most basic DIY project, this was a huge undertaking.
This project was one of those things that I needed to get out of the way as it was the “critical point/activity” in my project. Before I could start with anything else in my bedroom makeover, I realized that nothing was ever going to work out with the existing colour I’ve got going. Since this room had to function as a mini office and a bedroom in one, it was in dire need of a big update.

The good news was that I spent $100 on the whole process, and that was only the paint job! I got new furnitures from Ikea for free! I’ll tell you more below ????
Painting the Bedroom
It took me 1 weekend to redo the paint job in my bedroom, and I think my bedroom is an average-sized room so it’s fairly do-able in that amount of time.
If there’s one thing to take away from my experience, don’t put in half the effort or say “this is good enough” when it’s not because the paint job is the most physical and time-demanding part of the process! Do it right the first time!
I went with a really expensive formula from Benjamin Moore (It was something ridiculous – $75 for a gallon) but it saved me even more time in having to prime, re-paint, put a top coat, etc! I went with the Aura Waterborne formula in the shade Gray Owl with eggshell finish which is their most expensive formula. It’s a primer/paint/top coat in one with very the highest pigmentation they offer. This means that despite having a dark wall to start out with (the dark pink you can see in the preview above), I don’t have to scrape or go-over it with a primer first. My sister went with a cheaper paint formula from CIL ($35) but it took her two whole weeks to finish (the formula was streaky!) and she had to re-purchase the paint because it would dry out unevenly.
If you guys want to know more about the painting process, and general tips I have for doing the work, let me know in the comment below! After getting the room done, I took a 6 months hiatus from any more work on the room which was a VERY smart decision as it allowed me to furnish my bedroom for free!
The Free IKEA Furnishing
As you might know, this past summer IKEA recalled their very popular Malm dressers – anything that is over 60cm can be brought back in-store for a store credit or cash refund. They don’t ask for receipt, and it can be in any condition and colour. If you wanted to keep your dresser you can get a free attachment kit that will secure the dressers to the wall to prevent tipping which is the main reason for the recall.

Long story short, I had accumulated (in having to move out for university), 2 MALM dressers that I can now bring back to IKEA for a refund. Since they were far too bulky, and no longer work for my bedroom (wrong colour, and too big!) I got them refunded for $250 including taxes. As you know, this is a pretty big chunk of money to spend at Ikea so here are a few things I was able to get (before their price increase) to refurnish my room:
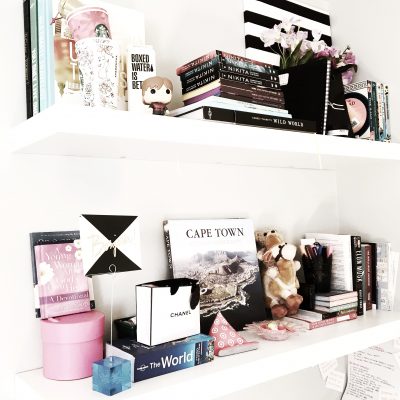
- 2x Ikea Lack Wall Shelves ($19.99 each)
- 1x LINNMON / ADILS Table Combination ($25.99)
- 1x Alex Drawer Unit from the As-Is Section ($57)
With money to spare to pick up some yogurt cones and hot dog on the way out! My favourite find (after 10 separate Ikea visits!) is the Alex drawer that I got from the “As-Is” section. I was stunned when I saw it – it was exactly what I needed (and you’re not a real beauty blogger without one right?) – in brand new, pristine condition! There was no scratches or markings of any kind that I could see there and even after asking 3-4 people when I got home to “inspect” the drawer, no one could see anything wrong with it! I knew it was a return since it wasn’t marked as “Display” and it still had that brand new IKEA furniture scent (You know what I’m talking about!) So thank you to whomever returned this – saved me a lot of time from having to build one and I got it at 30% off too!
As you can probably tell, I’m obsessed with my Ikea finds, and have taken many return trips since. I hope this post is somewhat helpful for anyone who is planning to undertake a similar project! If there’s anything else you want to know, leave me a comment below!
